


3. Features
Monitor controllers are available in various formats to suit different applications. Most offer at least simple routing and a volume control, but higher-end controllers often feature complex matrix routing options along with a selection of other useful tools. Well now take a look at the more common functions of the monitor controller, which should give you a fuller understanding of their capabilities, and help you to select the right product for your application.
Audio Gain Control (Volume)
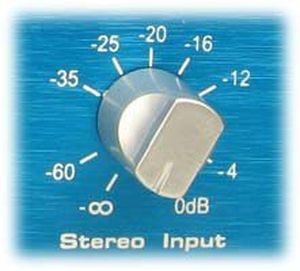
The most important function of a monitor controller is to control the output level (or volume) feeding the monitors. In a classic studio situation, the level of the monitor speakers is controlled from a mixer, but if they are being used directly with a DAW, having to control the master level from an on-screen fader can be not only slow and irritating, but there is also the risk of damaging speaker cones if youre unable to quickly reduce sudden unintentional or unexpected noise such as feedback. Furthermore, reducing overall volume from your DAW means that less digital bits are being used to represent the signal, and this degrades sound quality, which a good analogue volume control will not. As with a mixing desk, the volume control can be a fader, but is more commonly a rotary pot.
Monitor or Output Selector
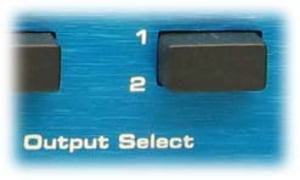
No matter how flat or neutral your studio monitors, its always a good idea to cross-reference your mixes on at least one alternative such as hi-fi speakers, or a second pair of studio monitors that have different characteristics to your main set. This can prove invaluable in locating mix problems - for instance a vocal that seemed at the perfect level can turn out to be almost inaudible on different speakers, telling you that the correct level is probably somewhere in between the two. It can be less than ideal though if you need to keep swapping cables around to feed other systems, or even worse, having to burn test CDs to play back on a hi-fi or car stereo. The monitor selection feature enables you to quickly and easily choose which playback system you want to listen through. If the monitor controller has surround sound capabilities then this feature really comes into its own, as you can quickly select individual monitors or subsets of them - extremely useful for listening to the rear speakers alone or isolating the sub for example, all while maintaining a constant level.
Mono Button
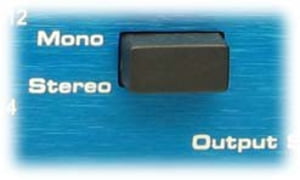
Modern music often uses a variety of stereo effects and recording techniques which sound great when played back in stereo, but do not always translate very well to mono, and can even disappear all together. Mono compatibility is less of an issue these days as most TVs and radios have stereo speakers, however there are still plenty of mono devices out there, and there are a number of other situations where audio is played back in mono, such as in some pubs and clubs for example. So maintaining mono compatibility is still an important part of the mixing process - the mono button of a monitor controller is a useful feature which allows you (and reminds you!) to do this quickly and easily.
Dim Button
Although often viewed as a useful but non-essential feature, this should not be overlooked. The dim button lowers the mix to a set level (or by a fixed amount) without affecting the main volume settings, so that when deselected, your mix returns to exactly the original level. Its very useful for checking a mix at lower volumes, as this can sometimes reveal that some instruments appear overpowered by others, which has not been apparent at normal mixing levels some mix engineers work almost exclusively at low levels, finding that mixes that work well quietly tend to work at all levels. The dim button is also particularly useful for temporarily dropping the monitor level when answering the studio phone!
Mute Button
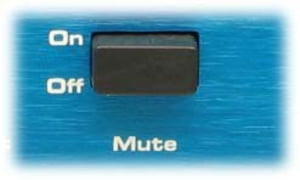
Monitor controllers often incorporate a mute button, or sometimes multiple mute buttons on surround controllers. These are a useful feature for isolating individual speakers or sets thereof, and are commonly found on larger mixing desks. Also good for answering particularly important calls on the studio phone!
Headphone & Monitor Mixes
Many monitor controllers incorporate a headphone amp to allow the mix to be listened to through headphones. This is another crucial part of the mixdown process as it can highlight problems which arent apparent on regular monitors, something which is even more important these days as the popularity of mp3 players and listening to music on the move is increasing rapidly. Some higher-end units offer several headphone outputs and also separate monitor mix controls - invaluable when recording multiple performers simultaneously, allowing different mix levels to be sent to different performers.
Talkback
Depending on your recording situation, it may be useful to have a talkback facility built in to your monitor controller, allowing communication between the control room and the recording area via the performers headphones. This feature is particularly useful for giving instructions to the performer on the fly, such as asking them to move closer to the microphone, or just to damn well sing it in tune this time please! Most models with talkback have an internal microphone, but some give the option of connecting an external mic, allowing it to be positioned independently of the controller. Look out for a non-latching switch for the mic, as this will spare your blushes if you happen to make an off-the-cuff remark when you think the talent is not listening!
Input Selector
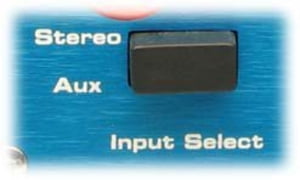
This allows you to select from a variety of playback sources, for instance allowing you to make a useful comparison between your mix and a commercial recording on a CD player - Some monitor controllers include an onboard RIAA preamp for direct connection of a turntable.
Digital to Analogue Converters
In addition to a selection of analogue inputs, some controllers also feature digital inputs which convert the digital output from your DAW or other source to analogue, ready to send to your speakers. Care should be taken when selecting a monitor controller with a DAC, as when choosing a soundcard, to make sure that the quality of the converters meets the standards you require. Also consider whether you will need wordclock connections (or even wordclock generation) to properly synchronise your digital equipment.
Metering
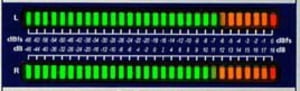
Having an output meter on your monitor controller is very useful - although all DAWs do have output meters, theyre often hidden on a busy screen when you need them most, and having a constantly viewable meter helps to ensure that you dont overload your monitor section, or clip when sending the output signal to a (properly aligned) master recorder. Dedicated meters will also tend to be more accurate than software meters, and are not affected by how hard your CPU is working on other processes.
Remote Controls
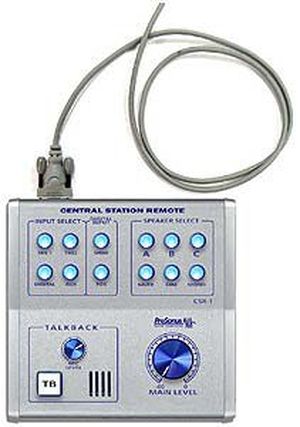
The majority of monitor controllers are designed to be kept within easy reach on a desktop. A drawback of this design is the shear number of cables that you end up having connected to it - multiple inputs and outputs, not to mention headphones, the power supply and even a mic. Some manufacturers have solved this problem by using a combination of a rackmount monitor controller that can be hidden away with your outboard, and a desktop remote control connected with a single cable for communication.
Your Contacts
Product Highlights


Offers
-
Studio Monitor Controllers